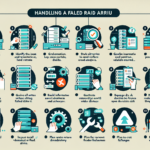
Recovering data from a failed RAID 5 array can be complex and requires careful handling to avoid further data loss. RAID 5 uses striping with parity, meaning data is distributed across all drives with one drive storing parity data for redundancy. If one drive fails, the array can still function. However, if multiple drives fail or the array becomes corrupted, recovery becomes more challenging. Here’s a step-by-step guide to recover data from a failed RAID 5 array:
Step 1: Assess the Situation
- Identify the failure type:
- Determine if the issue is due to a failed drive, controller, software corruption, or physical damage.
-
Verify how many drives have failed. RAID 5 can tolerate one drive failure but fails if two or more drives are affected.
-
Stop all write operations:
-
Avoid making changes to the array as this could overwrite data and reduce the chances of recovery.
-
Document your setup:
- Record the RAID configuration (block size, stripe size, order of disks, etc.) and other details. This will be helpful during the recovery process.
Step 2: Secure the Drives
- Label the drives:
-
Mark the order of the drives in the array to ensure they are connected in the same sequence during recovery.
-
Create disk images:
-
Use tools like
ddor other disk imaging software to create raw images of each drive. This ensures you have backups to work with if something goes wrong during recovery. -
Inspect the drives:
- Test the drives individually using tools like SMART diagnostics to identify faulty drives.
Step 3: Replace or Repair Faulty Drives
- Replace failed drives:
-
If only one drive has failed, replace it with a new drive of the same size and type to rebuild the array (if supported by your RAID controller).
-
Check for controller issues:
- If the RAID controller is faulty, you may need to replace or repair it. Ensure the replacement controller supports the same RAID configuration.
Step 4: Use RAID Data Recovery Tools
If the array is still inaccessible or multiple drives have failed, use specialized recovery tools/software. Here are some options:
- RAID Recovery Software:
-
Tools like
R-Studio,EaseUS Data Recovery Wizard,DiskInternals RAID Recovery, orUFS Explorer RAID Recoverycan reconstruct the array and retrieve the data. -
Manual Reconstruction:
-
If you know the RAID parameters (stripe size, drive order, etc.), you can manually rebuild the array using recovery software or a hex editor to extract the data.
-
Linux mdadm (if using software RAID):
- If the RAID 5 array was built using Linux software RAID, use
mdadmcommands to attempt recovery or rebuild:
bash

     mdadm --assemble /dev/md0 /dev/sd[bcd]
Replace/dev/sd[bcd]with the appropriate drive paths.
Step 5: Consult Professional Data Recovery Services
If the recovery attempts fail or the data is critical, contact a professional data recovery service. These companies have advanced tools and expertise to recover data from failed RAID arrays. Ensure the service is reputable and has experience with RAID 5.
Step 6: Rebuild and Test the Array
- Rebuild the RAID array:
-
Once data recovery is complete, rebuild the RAID array, replacing failed drives and ensuring the configuration is correct.
-
Test the array:
- Verify the array’s functionality and ensure no further issues.
Step 7: Implement Preventative Measures
- Regular backups:
-
RAID is not a substitute for backup. Implement a robust backup solution to ensure data availability in case of failure.
-
Monitor RAID health:
-
Use monitoring tools to check the health of the drives in the RAID array regularly.
-
Use enterprise-grade hardware:
- Ensure the drives and RAID controller are of high quality and suitable for your workload.
Important Notes
- If you’re unsure about any step, it’s better to consult professionals to prevent data loss.
- Avoid rebuilding the array or initializing the drives prematurely, as this could overwrite the parity data and make recovery impossible.
By following these steps, you can increase the chances of recovering data from your RAID 5 array.


