Performing a bare-metal restore for critical servers is a crucial recovery operation in the event of hardware failure, data corruption, or other catastrophic issues. Here’s a step-by-step guide to performing a bare-metal restore:
Preparation Before Disaster
Ensure the following are in place to simplify bare-metal restoration when required:
1. Regular Backup:
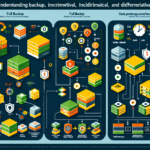
– Implement a comprehensive backup strategy (e.g., full, differential, or incremental backups).
– Use enterprise-grade backup tools like Veeam, Commvault, Veritas NetBackup, or Acronis.
– Store backup data in multiple locations (on-premises, cloud, offsite).
- Document Configuration:
- Maintain detailed documentation of server configurations (hardware specs, IP addresses, installed software, firewall rules, etc.).
-
Save copies of critical configuration files (e.g.,
/etcfor Linux, registry and configs for Windows servers). -
Bootable Recovery Media:
- Create bootable media (USB or ISO) containing recovery tools and OS installation files.
-
Test the boot media regularly to ensure functionality.
-
Test Restores:
-
Periodically test the restoration process in a lab environment to ensure backups are valid.
-
Drivers and Firmware:
- Ensure you have access to the drivers for hardware (RAID controllers, NICs, GPUs, etc.) and firmware versions required for your servers.
Steps for Bare-Metal Restore
Step 1: Confirm the Hardware
- Verify that the replacement hardware matches the original configuration or is compatible with your server backups (e.g., same RAID controller, disk layout, etc.).
- If using virtualization, ensure the hypervisor (VMware, Hyper-V, etc.) or bare-metal host is ready.
Step 2: Boot Into Recovery Mode
- Insert the bootable recovery media (USB, ISO, or PXE boot) into the server.
- Configure BIOS/UEFI settings to boot from the recovery media.
- If the server uses RAID, ensure the RAID controller is configured correctly before proceeding.
Step 3: Identify Backup Source
- Identify the location of the backup data:
- Local disk or SAN/NAS storage.
- Offsite/cloud repository.
- Tape backup system (if applicable).
- Ensure the recovery tool has network access if retrieving backups from remote locations.
Step 4: Partition and Format Disks
- Use the recovery tool to partition and format the disks as required.
- Match the disk layout to the original configuration if necessary (e.g., primary partitions, LVM for Linux, RAID arrays).
Step 5: Restore the Backup
- Start the restore process using your backup software:
- For block-level backups (e.g., disk image backups), select the appropriate image and restore it to the server.
- For file-level backups, restore the operating system first, followed by applications and data.
- Follow prompts to ensure successful recovery.
Step 6: Install Missing Drivers
- After the OS is restored, install missing drivers (e.g., RAID controller, network interfaces, GPU drivers for AI workloads).
- Ensure proper hardware functionality.
Step 7: Verify System Configuration
- Check all configurations, including:
- Network settings (IP addresses, DNS, gateway).
- Storage mounts (SAN/NAS shares, iSCSI targets).
- Application and service dependencies (e.g., databases, middleware, web servers).
Step 8: Test System Functionality
- Test critical applications and services to ensure they are working as expected.
- Verify access permissions, file integrity, and overall server performance.
Step 9: Apply Updates
- Update the operating system, applications, and security patches to match the latest versions.
- Reapply any custom configurations that may have been lost during restoration.
Step 10: Document and Monitor
- Document the restoration process and any changes made during recovery.
- Implement monitoring tools (e.g., Nagios, Zabbix, Prometheus) to track the server’s health and performance.
Additional Considerations
Disaster Recovery for Virtualized Environments:
- If you use virtualization (e.g., VMware, Hyper-V, Kubernetes), bare-metal restore may involve restoring VM snapshots or templates rather than physical hardware.
- Ensure hypervisor backups and configurations are included in your disaster recovery plan.
GPU Workloads:
- For AI or compute-intensive workloads requiring GPU cards (e.g., NVIDIA GPUs), ensure CUDA drivers and libraries are properly restored.
Kubernetes Workloads:
- For Kubernetes clusters, restore etcd (or other cluster configuration storage) and redeploy workloads using manifests or Helm charts.
- Verify persistent volumes and storage classes are correctly reattached.
Cloud Integration:
- If critical servers are integrated with cloud platforms (e.g., Azure, AWS), verify connectivity and restore cloud resources as needed.
Post-Restore Validation
Once the server is restored:
1. Perform a thorough validation of all services.
2. Notify stakeholders of the restoration status.
3. Analyze root cause and refine your disaster recovery plan if necessary.
By following these steps, you can minimize downtime and restore critical servers efficiently in a bare-metal recovery scenario.


