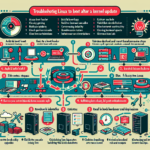
Resolving kernel panic issues in Linux VMs running on VMware can be challenging, as it involves diagnosing the root cause of the problem. Here are the steps you can take to identify and resolve the issue:
1. Understand the Kernel Panic
A kernel panic is triggered when the Linux kernel encounters a critical error that it cannot recover from. The panic message displayed on the screen or logged in system logs will provide clues about the issue. It’s essential to analyze the message and determine the cause.
2. Collect Logs and Diagnostic Information
Start by collecting all relevant logs and diagnostic data:
– VMware Logs: Check the VMware log files (vmware.log) for the specific VM. These are located in the VM folder.
– Linux Logs: Access the logs from the Linux VM. Common logs to check include:
– /var/log/messages
– /var/log/syslog
– /var/log/kern.log
– /var/crash (if configured for kernel crash dumps)
– Panic Message: If the VM is displaying a kernel panic message, take a screenshot or note the error details.
3. Analyze the Kernel Panic Message
The panic message typically contains key information, such as:
– Faulting process or module
– Memory addresses
– Error codes
– Stack traces
Common causes of kernel panic include:
– Incompatible kernel modules or drivers.
– Filesystem corruption.
– Hardware issues (e.g., virtual hardware misconfiguration).
– Resource exhaustion (e.g., out of memory).
4. Verify VMware Compatibility
Ensure the Linux VM is running a supported operating system version for the VMware environment:
– Check the VMware Compatibility Guide for supported guest OS versions.
– Update VMware Tools to ensure proper integration between the VM and the hypervisor.
– Verify the virtual hardware version of the VM matches the requirements for the guest OS.
5. Update the Linux Kernel
Kernel panics can occur due to bugs in the Linux kernel. Update the kernel to the latest stable release:
– Use your package manager (e.g., apt, yum, or dnf) to update the kernel.
– Reboot the VM after the update and test if the issue persists.
6. Check Virtual Hardware Configuration
Misconfigured virtual hardware can lead to kernel panics. Verify the following:
– CPU and Memory: Ensure adequate CPU and memory resources are allocated to the VM.
– Disk Configuration: Check virtual disk settings (e.g., SCSI controller type). Try switching between LSI Logic, VMware Paravirtual, or BusLogic controllers if needed.
– Network Adapter: Ensure the virtual NIC is properly configured and matches the guest OS requirements.
– GPU Configuration: If using GPUs, ensure proper passthrough or vGPU setup.
7. Test Kernel Parameters
Sometimes kernel parameters may need to be adjusted to prevent panics:
– Modify boot parameters in /etc/default/grub (e.g., quiet, nomodeset, or disabling certain modules).
– Update GRUB configuration using sudo update-grub and reboot.
8. Check Filesystem Integrity
Corruption in the filesystem can cause kernel panics:
– Boot into a rescue mode or Live CD.
– Run fsck on the affected partitions to check for and repair filesystem errors.
9. Investigate Third-Party Drivers or Modules
If the VM is using third-party drivers (e.g., for GPUs, storage, or network), ensure they are compatible with the kernel version:
– Update or reinstall drivers.
– Temporarily disable or remove suspect modules to test stability.
10. Enable Crash Dumps
Configure the Linux VM to capture crash dumps for further analysis:
– Install kexec-tools and configure /etc/kdump.conf to enable kernel crash dump functionality.
– Set up a dedicated location for storing crash dumps (e.g., /var/crash).
– Analyze the dump file with tools like crash.
11. Test VMware-Specific Settings
Some VMware settings or features might conflict with the Linux VM:
– Hardware Compatibility: Ensure the VM is configured to use the correct hardware version.
– VMware Tools: Update VMware Tools to the latest version.
– Advanced Features: Test disabling advanced features like memory ballooning, nested virtualization, or hyperthreading if applicable.
12. Check Resource Utilization
Kernel panics can occur if the VM runs out of critical resources:
– Monitor resource usage on the VM using tools like top, htop, or vmstat.
– Ensure the physical host has adequate resources (CPU, memory, disk I/O) to handle the VM workload.
13. Revert to Previous State
If the issue started after a recent change (e.g., kernel update, system update, or configuration change):
– Roll back to a previous kernel version using the GRUB boot menu.
– Restore the VM from a snapshot or backup taken before the issue occurred.
14. Engage VMware Support
If you are unable to resolve the kernel panic, consider opening a support case with VMware. Provide them with the collected logs, panic messages, and steps to reproduce the issue.
15. Proactive Measures
To prevent future kernel panics:
– Regularly update the Linux OS, kernel, and VMware Tools.
– Test updates and changes in a staging environment before applying them in production.
– Implement monitoring tools to track resource usage and detect anomalies early.
By following these steps systematically, you should be able to identify and resolve kernel panic issues in your Linux VMs running on VMware.

Ali YAZICI is a Senior IT Infrastructure Manager with 15+ years of enterprise experience. While a recognized expert in datacenter architecture, multi-cloud environments, storage, and advanced data protection and Commvault automation , his current focus is on next-generation datacenter technologies, including NVIDIA GPU architecture, high-performance server virtualization, and implementing AI-driven tools. He shares his practical, hands-on experience and combination of his personal field notes and “Expert-Driven AI.” he use AI tools as an assistant to structure drafts, which he then heavily edit, fact-check, and infuse with my own practical experience, original screenshots , and “in-the-trenches” insights that only a human expert can provide.
If you found this content valuable, [support this ad-free work with a coffee]. Connect with him on [LinkedIn].


